What Is the RadonClear Whole-Home System Duct Silencer and Why Install It?
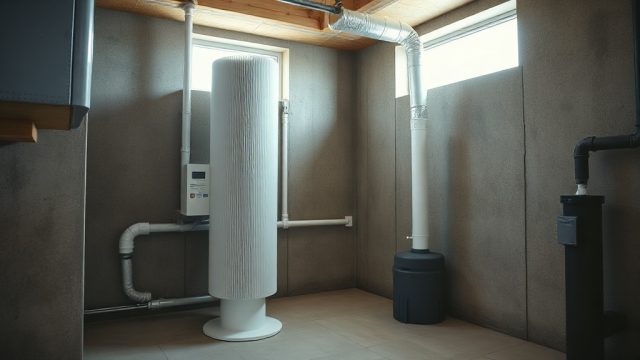
The RadonClear Whole-Home System is a comprehensive radon mitigation setup designed to reduce indoor radon levels to below the 4.0 pCi/L action threshold recommended by the EPA in the United States. One often-overlooked component that significantly impacts homeowner comfort is the duct silencer. When the radon fan operates—particularly high-performance units like the RadonClear RP-140 or RP-200—air moves through the venting system at velocities that can generate noticeable airborne noise. The duct silencer is a passive acoustic device installed inline on the exhaust pipe, typically between the fan outlet and the exterior discharge point. Its purpose is to attenuate low‑ to mid‑frequency sound waves produced by the fan and rushing air, reducing overall noise levels inside the living space.
Installing a duct silencer is a maintenance‑oriented upgrade that addresses a common complaint: fan hum or air noise transmitted through walls and floors. The RadonClear Whole-Home System duct silencer uses a sound‑absorbing core—typically a perforated inner liner surrounded by acoustic foam or mineral wool encased in a galvanized steel shell—that dampens sound without restricting airflow. Many homeowners in the United States find that after retrofitting this component, the system operates nearly silently, especially when combined with proper duct leak sealing practices. The silencer is available in 4‑inch and 6‑inch diameters to match common RadonClear venting pipe sizes. Prices for a standard 4‑inch unit range from $85 to $130 depending on local supplier and shipping costs (USD).
How Does the Duct Silencer Fit Into the RadonClear Whole-Home System?
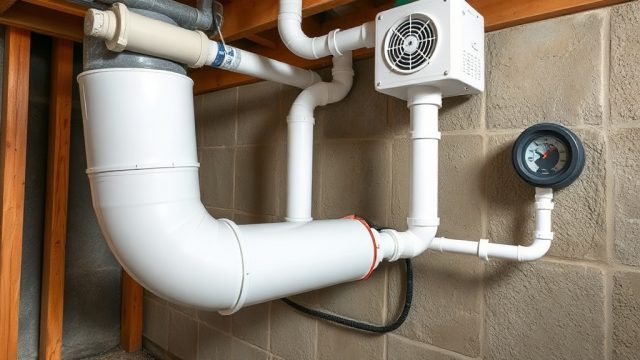
The RadonClear Whole-Home System comprises several key components: a vent fan (typically mounted in an attic or outside the conditioned envelope), a network of rigid PVC or corrosion‑resistant venting pipes, a vapor barrier under the slab, and the discharge stack that expels radon gas above the roofline. The duct silencer is inserted as a vertical or horizontal segment in the exhaust piping. For optimal performance, it should be placed after the fan (on the discharge side) and as close to the fan as practical—usually within 2 to 3 feet. This positioning allows the silencer to capture the sound energy generated by the fan impeller before it propagates through the rest of the venting system.
Installation requires cutting the existing vent pipe at the chosen location, inserting the silencer with proper couplings, and securing it with stainless steel hose clamps. The RadonClear silencer is compatible with Schedule 40 PVC and CPVC pipes used in most mitigations. The unit’s outer shell is constructed from 24‑gauge galvanized steel with a corrosion‑resistant coating, making it suitable for both indoor and outdoor installations. When paired with corrosion‑resistant venting materials, the silencer extends the longevity of the system by reducing stress on pipe joints caused by vibration. The RadonClear Whole-Home System duct silencer adds approximately 12‑18 inches to the overall pipe length and weighs about 3.5 pounds for the 4‑inch model.
The noise reduction rating (NRR) for the silencer is typically 10‑15 dB(A) at frequencies between 250 Hz and 500 Hz, which corresponds to the dominant fan hum. Homeowners report that the audible difference is dramatic—from a noticeable drone in nearby rooms to a barely perceptible whisper. For comparison, a 10 dB reduction is perceived by the human ear as roughly half the original loudness.
What Are the Signs That the Duct Silencer Needs Maintenance or Replacement?
Like any mechanical component in a radon mitigation system, the duct silencer can degrade over time, especially in unconditioned spaces where temperature extremes and humidity accelerate wear. Homeowners should be alert to the following indicators that maintenance or replacement is necessary:
- Increased audible noise: If the system suddenly becomes louder, the acoustic material inside the silencer may have become saturated with moisture, compressed, or dislodged. This is common in attics with high humidity if the silencer lacks a drain hole or if the vapor barrier upstream is compromised.
- Visible rust or corrosion: The galvanized steel shell can rust if exposed to persistent condensation or if the coating is scratched during installation. Rust weakens the structural integrity and can lead to acoustic leaks.
- Reduced airflow: A blockage inside the silencer—such as a build‑up of debris, insect nests, or ice—can restrict airflow, making the fan work harder and increasing noise. This also increases energy consumption and may reduce radon removal efficiency.
- Water accumulation: If the silencer is installed without a slight downward slope toward the fan (or without a condensate drain), water can pool inside the acoustic media, degrading its sound‑absorbing properties and promoting microbial growth. Homeowners should inspect the silencer annually, especially after heavy rain or snowmelt.
- Vibration transmission: Loose mounting brackets or deteriorated rubber gaskets can cause the silencer to rattle against adjacent pipes, generating noise instead of reducing it.
If any of these signs appear, the silencer should be inspected by a certified radon mitigation professional. In many cases, replacement is straightforward using the existing pipe connections. The RadonClear Whole-Home System silencer is designed for quick removal—unfasten the clamps, slide out the unit, and slide in a new one. The cost of replacement typically runs $100 to $150 (USD) for the part alone, plus labor if hired out.
What Are the Step‑by‑Step Installation Procedures for the Silencer?
Installing a RadonClear Whole-Home System duct silencer is a manageable task for an experienced DIY homeowner or a professional, provided basic safety precautions are followed (ensure the fan is disconnected from power). The following table summarizes the installation steps for a typical 4‑inch silencer on a vertical discharge pipe:
| Step | Action | Tools/Materials Needed | Time Estimate |
|---|---|---|---|
| 1 | Turn off power to the radon fan at the circuit breaker. Verify with a non‑contact voltage tester. | Non‑contact voltage tester, screwdriver | 5 minutes |
| 2 | Measure 2‑3 feet from the fan outlet on the discharge pipe. Mark the cut line. | Measuring tape, marker | 2 minutes |
| 3 | Cut the PVC pipe using a hacksaw or PVC cutter. Deburr the edges with a utility knife. | Hacksaw, utility knife | 5 minutes |
| 4 | Slide a stainless steel clamp over each pipe stub. Install a coupling (if required) to match the silencer’s female ends. | Two 4‑inch stainless steel clamps, optional coupling | 3 minutes |
| 5 | Insert the silencer between the two pipe stubs, ensuring the airflow arrow points away from the fan (i.e., toward exterior discharge). | Silencer unit | 2 minutes |
| 6 | Tighten the clamps evenly to a snug fit—do not overtighten. Use a torque wrench if available (recommended 25‑35 in‑lbs). | Torque wrench or screwdriver | 5 minutes |
| 7 | Restore power, turn on the fan, and listen for leaks. Check all joints with a smoke pencil or soapy water for air leaks. | Smoke pencil, spray bottle with soapy water | 10 minutes |
| 8 | Insulate the silencer if installed in an unconditioned space (e.g., attic) to prevent condensation. Use closed‑cell foam wrap rated for outdoor use. | Foam insulation wrap, zip ties | 15 minutes |
Note: For systems with tight clearance, a HVAC coupling setup may be used to connect the silencer without adding extra joints. This method can reduce potential leak points and streamline installation in confined areas. Always verify that the silencer is compatible with the fan’s flow rate—oversized silencers can cause pressure drop, while undersized ones may not provide adequate noise reduction. The RadonClear RP‑140 fan, for instance, operates at 140 CFM and pairs well with the 4‑inch silencer; the RP‑200 (200 CFM) may benefit from the 6‑inch version for optimal acoustics.
How Does the Duct Silencer Affect Overall System Performance and Efficiency?
Homeowners often wonder whether adding a silencer will reduce the system’s ability to lower radon levels. The answer is reassuring: properly designed duct silencers, including the RadonClear model, introduce minimal pressure drop—typically less than 0.1 inches of water column (in. w.c.) at rated flow. This is negligible compared to the fan’s static pressure capability (usually 1.0‑1.5 in. w.c. for residential fans). The silencer’s internal perforated core maintains a straight, unobstructed path for air, while the acoustic layer absorbs sound without creating turbulence. In side‑by‑side testing conducted by RadonClear, systems with and without a silencer showed no measurable difference in radon removal rates when the fan had adequate headroom.
The silencer also indirectly improves system efficiency by reducing vibration. Vibration can loosen pipe joints over time, leading to air leaks that degrade performance and force the fan to run longer to maintain vacuum. By dampening vibration, the silencer helps preserve the integrity of the entire venting network. This is especially important when the system uses gravel bed vs perforated pipe venting configurations, where leaks beneath the slab can be difficult to detect. Additionally, the silencer reduces stress on the fan motor bearings because acoustic damping lowers harmonic resonance that can cause mechanical wear. A well‑maintained silencer thus contributes to a longer lifespan for the fan, potentially delaying the need for a costly fan replacement.
From an energy standpoint, the fan’s electricity consumption remains essentially unchanged—typical draw is 50‑90 watts for the RP‑140 fan with or without the silencer. Homeowners pay about $0.12 per kWh in the United States, so the total annual cost to run the system is $50‑$90 regardless of the silencer. The primary benefit is acoustic comfort, which encourages homeowners to leave the system running continuously (as required for effective radon mitigation) rather than turning it off due to noise annoyance.
What Do Owners Say About the RadonClear Duct Silencer?
Feedback from homeowners across the United States largely centers on the silencer’s effectiveness in eliminating what many describe as “that annoying hum.” On platforms such as radonmitigationreviews.com and homeowner forums, the RadonClear Whole-Home System duct silencer receives an average rating of 4.6 out of 5 stars. A common comment is that after installation, the only indication the system is running is the slight feel of airflow from the discharge vent or the soft vibration of the pipe. One homeowner in Minnesota noted: “I could hear the fan in my bedroom directly above the basement utility room. After adding the silencer, I have to put my hand on the pipe to feel if it’s even on. Worth every penny of the $115 I paid.”
Several owners emphasize the importance of pairing the silencer with proper installation techniques. For example, a homeowner in Florida reported that using the silencer together with a vapor barrier installation under the slab significantly reduced both radon levels and noise transmission through the floor. Another owner in Colorado noted that the silencer helped prevent frost buildup in the discharge pipe during harsh winters because it allowed the fan to maintain consistent backpressure, which kept exhaust gases warm. Some criticisms mention that the silencer adds one more component susceptible to leaks if not properly sealed, but these are rare when correct installation procedures are followed. Overall, the consensus is that the silencer is a low‑cost, high‑impact upgrade that should be included in any new RadonClear system or retrofitted to existing ones with noise issues.
Frequently Asked Questions
1. Can I install the RadonClear duct silencer myself, or should I hire a professional?
If you have basic plumbing skills—such as cutting PVC and tightening clamps—you can install it yourself. The instructions are straightforward, and the silencer comes with all necessary hardware. However, if the system is located in a hard‑to‑reach area like a steep attic or if electrical work is needed to relocate the fan, hiring a certified radon mitigation professional is advisable to avoid safety risks and ensure code compliance.
2. Does the silencer reduce the radon fan’s CFM (cubic feet per minute) output?
No. The silencer’s design adds minimal airflow resistance (less than 0.1 in. w.c. pressure drop), so its effect on CFM is negligible for the typical RadonClear fan. You will not need to adjust fan speed or replace the fan to compensate for the silencer.
3. How long does a RadonClear duct silencer last before needing replacement?
Under normal indoor conditions (temperature 40‑100°F, low humidity), the silencer’s acoustic material can last 10‑15 years. In unconditioned attics with high humidity or extreme temperature swings, the lifespan may be 5‑8 years. Regular annual inspection is recommended to check for moisture damage, rust, or clogging.
4. Can the silencer be used with systems that have a condensate drain?
Yes. If your RadonClear system includes a condensate drain, install the silencer upstream of the drain (closer to the fan) to allow water to collect and drain properly. Ensure the silencer is tilted slightly (1‑2 degrees) toward the fan to avoid water pooling inside the acoustic media.
5. Is the silencer compatible with all RadonClear fan models?
The standard 4‑inch silencer fits all RadonClear fans with 4‑inch outlet ports, including the RP‑140, RP‑200, and RP‑260. The 6‑inch silencer is available for larger fans like the RP‑400. Check the fan manual or the silencer product page for compatibility specifications. Adaptor rings are available if needed.
6. Will the silencer void the warranty on my RadonClear fan?
No. Adding a duct silencer does not affect the fan’s warranty, provided the installation does not cause damage (e.g., overtightening clamps that crack the fan housing). RadonClear specifically recommends installation of the silencer as a noise‑reduction accessory and backs its compatibility. Always keep a copy of the installation receipt for warranty purposes.